|
brainfart
|
|
|
Group: Forum Members
Posts: 198,
Visits: 1.4K
|
http://www.rc-network.de/magazin/artikel_06/art_06-020/art_020-01.htmlUnfortunately this is in German. Maybe you can make sense out of the pictures, if you have problems just ask. Dark green is several layers of regular adhesive tape. Red is gelcoat or 2 component in-mould coating. The result is this: 
|
|
|
|
|
brainfart
|
|
|
Group: Forum Members
Posts: 198,
Visits: 1.4K
|
 You could also stop at this step, remove the adhesive tape and then laminate some fabric over the gap.
|
|
|
|
|
brainfart
|
|
|
Group: Forum Members
Posts: 198,
Visits: 1.4K
|
I don't have the proper vocabulary to describe all this since obviously English is not my native language. Maybe you can also produce some of these overlaps on each one of the two parts, and then slide them together with some epoxy glue applied to each flange. Hope you know what I mean.
Anyway, hope you get the idea and figure out a way to do this.
|
|
|
|
|
Hanaldo
|
|
|
Group: Forum Members
Posts: 2.5K,
Visits: 28K
|
BlackNDecker (19/06/2014)
I won't be able to mold this as a one piece unit. The shape is too complex. It will have to be two separate pieces that are then bonded together. <-- This is what I am most nervous about. I don't know how to prepare the bonding seams on the two halves of the final part....and, Easycomposites won't post the 3rd and final video in their series on complex multi-part molds which shows how to do it  ((( I don't believe that video would answer your question anyway, as EC have built that mould to use pre-preg and build the part in one piece then disassemble the mould after it is cured. No bonding together in that one. With the shape of your part I believe you could do the same, but the techniques for doing it with infusion are slightly tricky and will take some practice. Definitely a good idea though, as doing it in one piece will always be be stronger. For bonding together the two halves, the way I do it is to place some individually cut out cells of soric along the bond line in the layout, which increases the bonding area. But given your part deals with air flow, I suggest doing it a different way. See my thread about trimming the parts down. Using a cutter and blocking it down will be difficult to get a nice bond line, believe me I've tried. Make the excess flange material your friend and use it as a guide. Then for bonding, give each edge a quick rub up with 60 grit and wipe them with acetone. Then what I do is place polyethylene packaging tape on the outside surface of the part approx 1mm below the edge. Do this for each edge to be bonded, and go slowly to line it up nicely. Then use a thixotropic structural adhesive and apply it to each edge. Then for parts that are a bit difficult to hold, place one half loosely back in its mould to hold it, and then join the two pieces. Take your time to make sure everything is lined up nicely, if you use a good adhesive with a high tack then this shouldn't be too difficult. Use a popstick to smooth out the adhesive that squeezes out the sides, this is why you have the packaging tape. Once you have it lined up the way you you want it, leave it for a bit to cure. Don't let it cure fully though, you are looking for the stage where the adhesive is still soft but is tacky enough that the pieces will be held pretty firmly (for me it's about an hour). Then gently pull off the packaging tape, leaving you with a nice sharp bond line. Once it has cured fully, place some 2" wide strips of carbon fibre or fibreglass along the bond line on the inside and wet them out with a paint brush. I then use an orbital sander to smooth out the bond line on the outside, but this is optional as the tape will give you a pretty neat line.
|
|
|
|
|
BlackNDecker
|
|
|
Group: Forum Members
Posts: 92,
Visits: 251
|
Thanks guys...I really appreciate the advice! Hanaldo, would you happen to have a link to your thread about trimming parts? I've read alot of your threads here but I haven't seen that one. I made some progress tonight. It's been raining all week and the humidity is high 80s/low 90s. Not the most ideal working conditions for an outdoor workshop but I got tired of waiting on the weather. The first layer of gelcoat went on fine...I let it set for right at 2 hrs and then laid the second coat. I got a small amount of alligatoring most likely due to not waiting long enough between coats 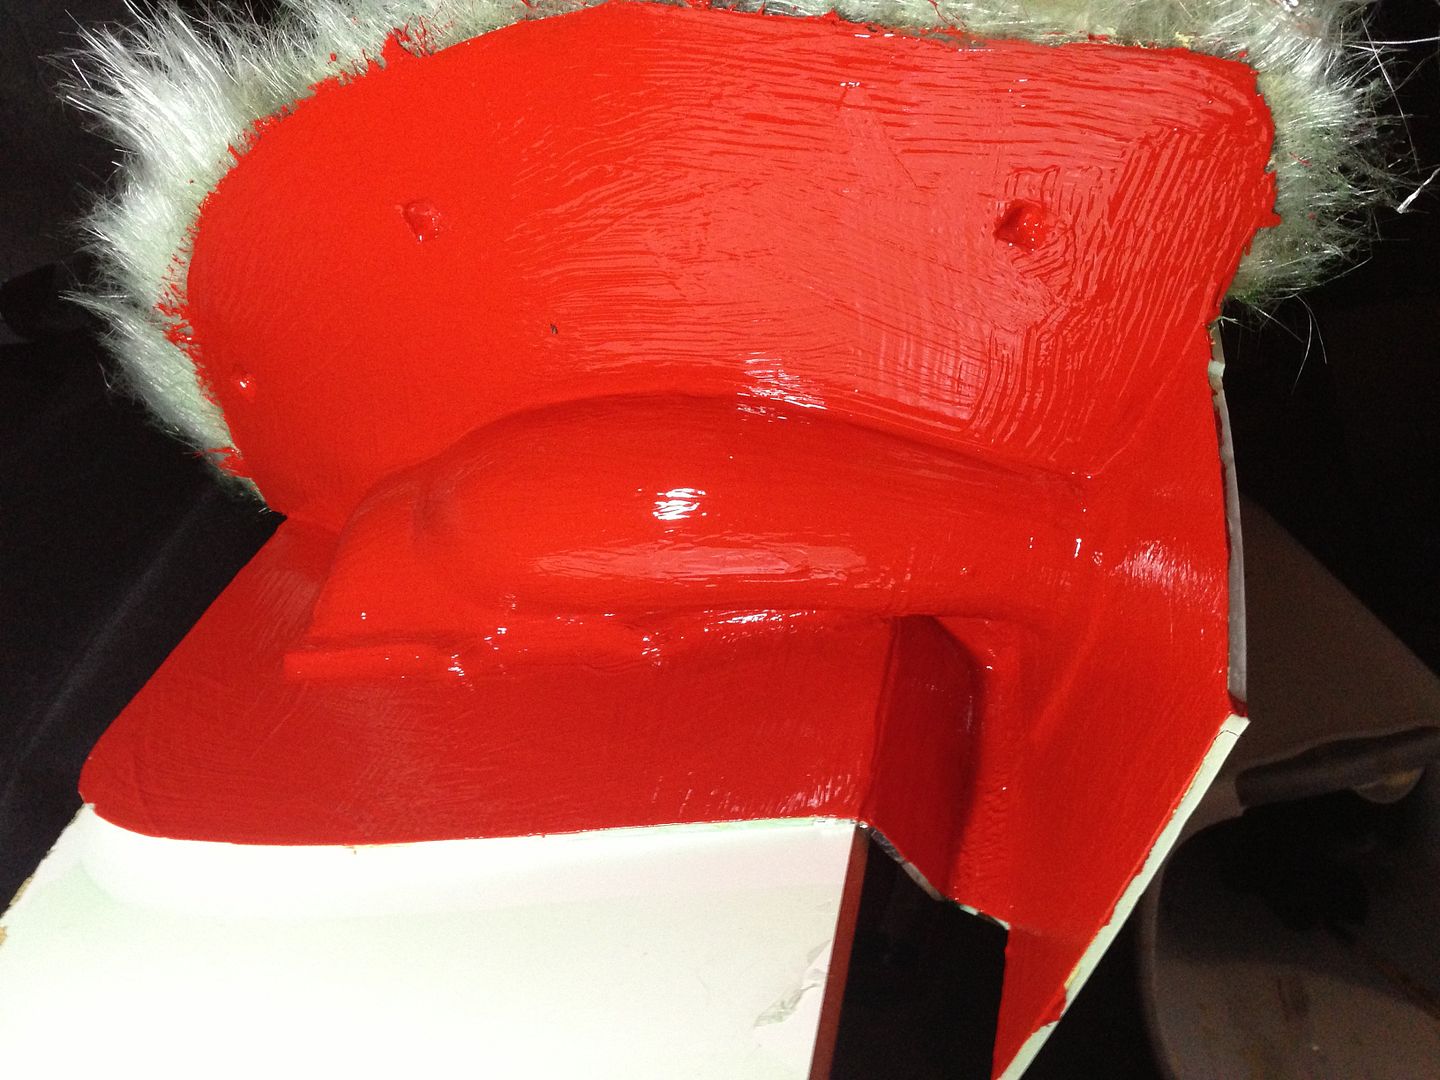 Here is a shot of the alligatoring:
|
|
|
|
|
Hanaldo
|
|
|
Group: Forum Members
Posts: 2.5K,
Visits: 28K
|
Sorry mate, I meant my thread about my OEM replica wing. You posted in it asking how I joined the parts together and I explained it in there  Don't worry too much about the alligatoring, can be fixed. Is that on the flange or on the part? Looks like it's on the flange. Either way, once it has cured and you can demould, just mix up some more gelcoat and fill the craters with it. Then put some cling film or packaging tape over the top of it so that it cures hard. If it's on the part then you'll have to do a bit of work sanding it smooth again, but if it's on the flange then I generally don't worry about it.
|
|
|
|
|
BlackNDecker
|
|
|
Group: Forum Members
Posts: 92,
Visits: 251
|
Indeed...the alligator skinning is only on the flange. Finished the mold this afternoon. How long do you all usually leave the mold to set before you demold the plug? FWIW, the mold post cured in the hot sun (~90* F) for a couple hours today.
|
|
|
|
|
BlackNDecker
|
|
|
Group: Forum Members
Posts: 92,
Visits: 251
|
I knocked out the mold of the lower plenum this weekend...it is now ready for business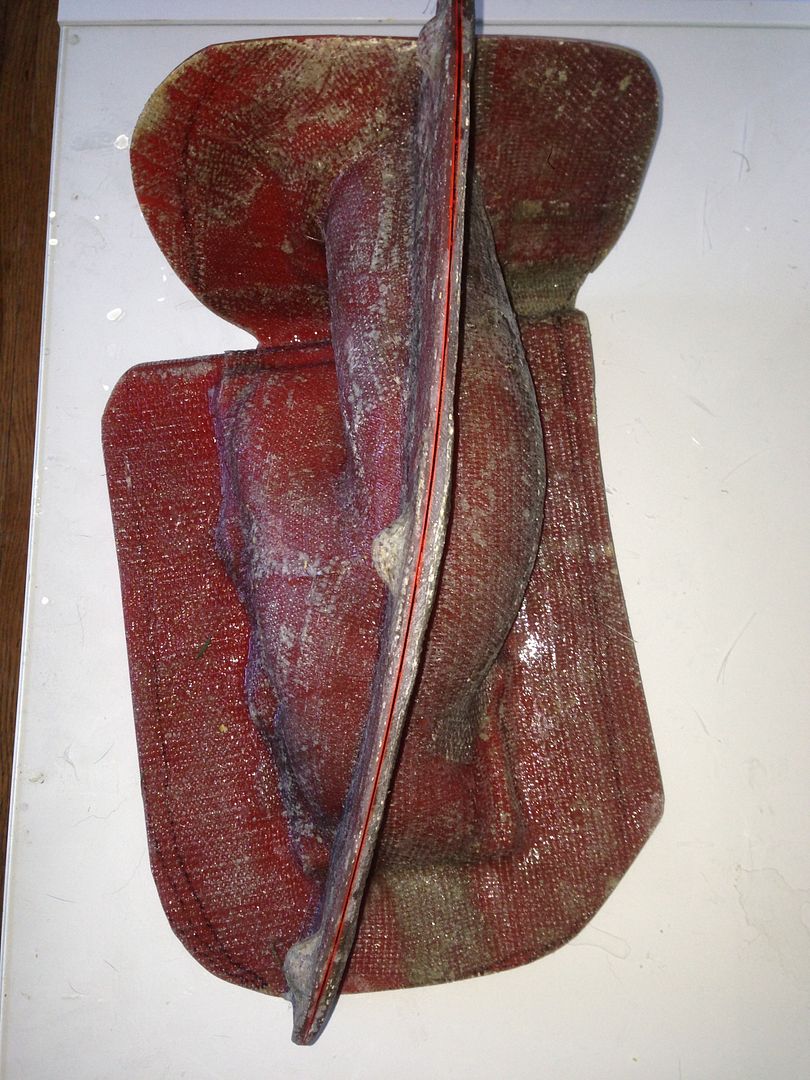
Needs to be cleaned and polished but otherwise it came out better than I expected. I now feel confident to step up to bigger projects.
|
|
|
|
|
Hanaldo
|
|
|
Group: Forum Members
Posts: 2.5K,
Visits: 28K
|
Looks good mate, came out well
|
|
|
|
|
BoostSamurai
|
|
|
Group: Forum Members
Posts: 34,
Visits: 413
|
Very nice and very interested in how this is progressing.
JZX World Forums
|
|
|
|