|
BoostSamurai
|
|
|
Group: Forum Members
Posts: 34,
Visits: 413
|
Preface: This is the first time I've ever touched fiberglass, resin or even CF Excuses: I'm a noob  Working outdoors (under cover though) It's winter here so temps and conditions (very windy) aren't ideal. Etc...  Products: Vinylester tooling gel coat, polyester resin + 198 cloth, wax + PVA Attempt #1: Mixed up tooling coat + hardener using incorrect ratios. Scrapped first attempt and started over. Attempt #2: I'm attempting to make a mold of my engine cover as it seems like a fairly simple part to start with. As you can see from the pic, I raised the part off my polycarbonate sheet slightly and then plugged up the bolt holes with filleting wax as well as smoothly extending/blending the sides of the part onto the base with some more wax. 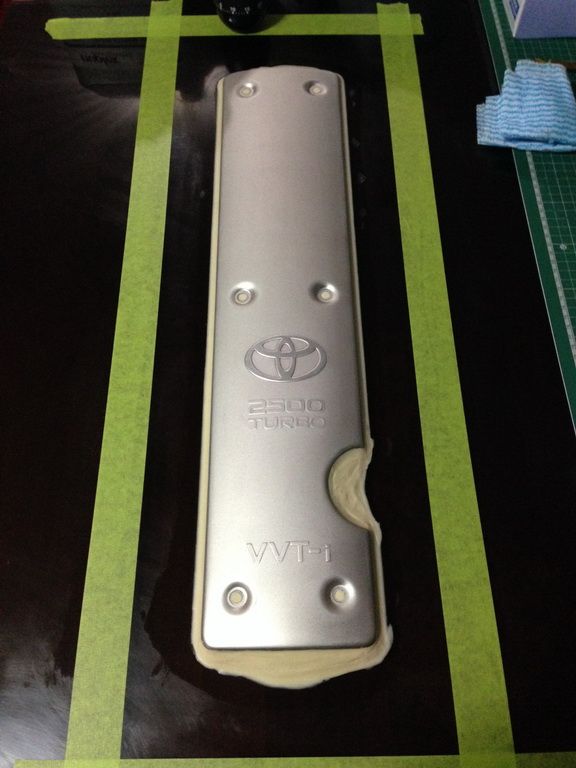 I then applied 6 layers of mold release wax to the part as per the manufacturers instructions. Followed by a single layer of PVA applied by brush, again, as per manufacturer instructions. I do not currently have access to any spray equipment. Stupidly I didn't apply any wax or PVA to the polycabonate sheet underneath as I though nothing would stick to it. Doh! Next, I mixed up the tooling coat (@1.5%) and applied it to the part and base as pictured. 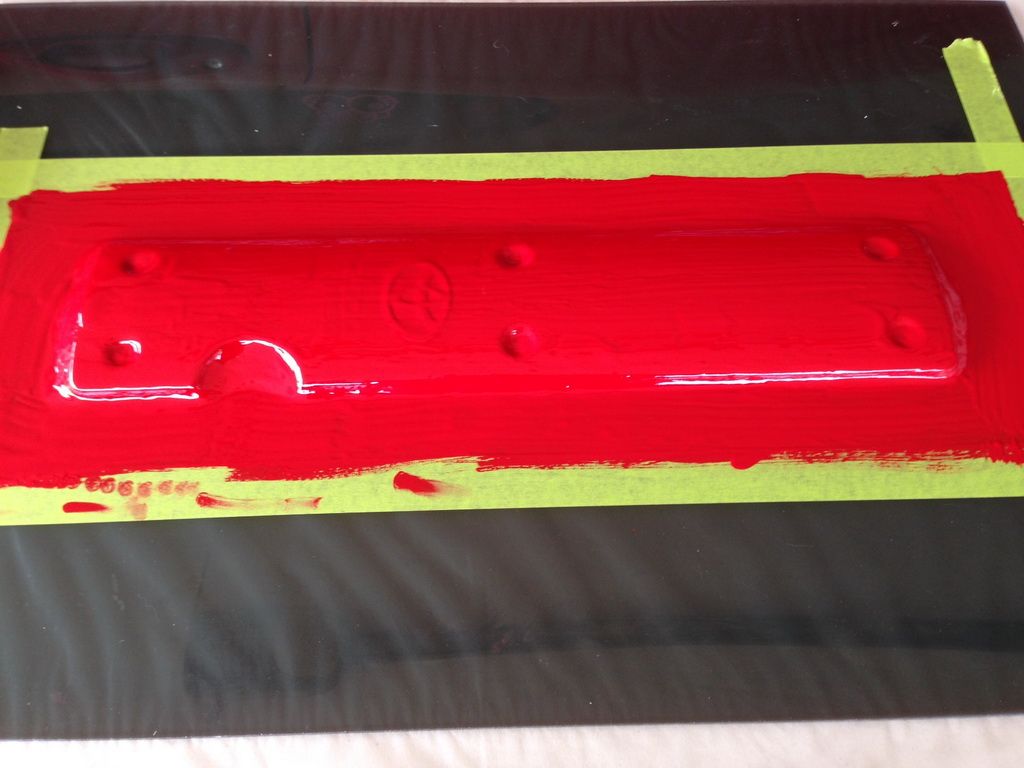 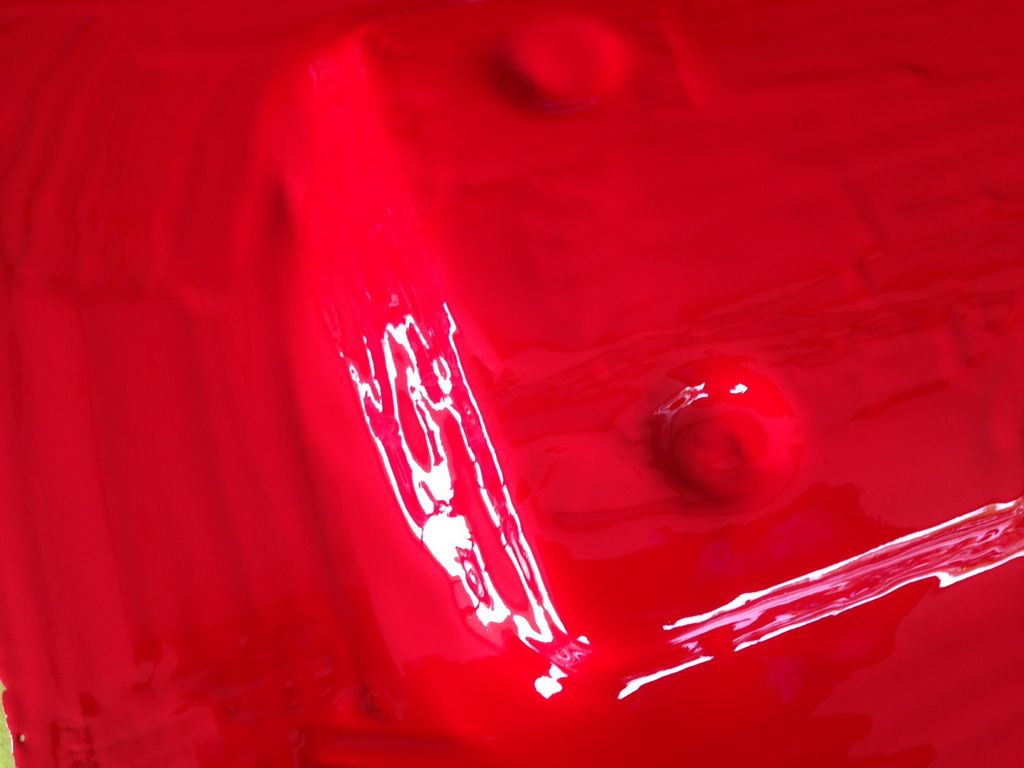 I left it overnight (perhaps a little too long) till it was tacky. I mixed up the polyester resin (again @ 1.5%) and applied it to the tooling coat. I then started off with one layer of 198 FG cloth. However, I could see issues starting to develop already so at that stage I made the decision that I wasn't going waste any more product and I was going to finish off the mold "as is" and use it as a learning experience. 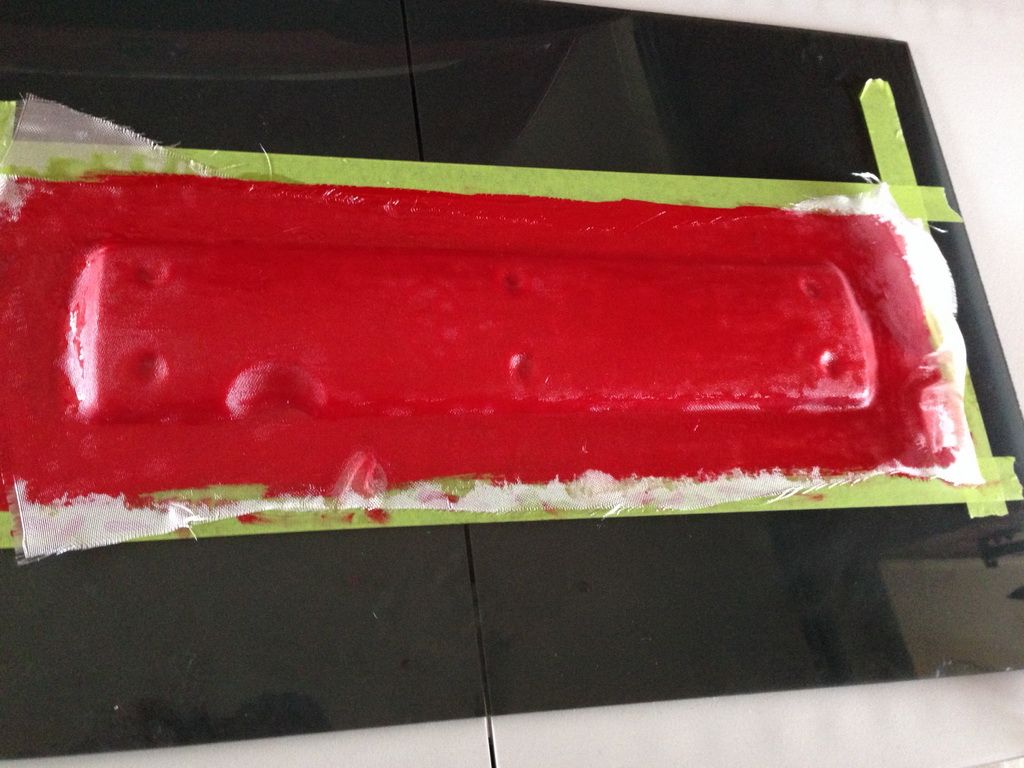 I had pre-cut the cloth as one large piece in the hope that it would drape over the part easily and conform. However, because of the indentations for the bolt holes, every time I tried to push it into place it would pull and lift elsewhere creating air voids. I tried to roll the air out but to no avail. Next time I will pre-cut the cloth differently, or alternatively, I plan on using CSM instead of cloth which looks like it might be more conformable. 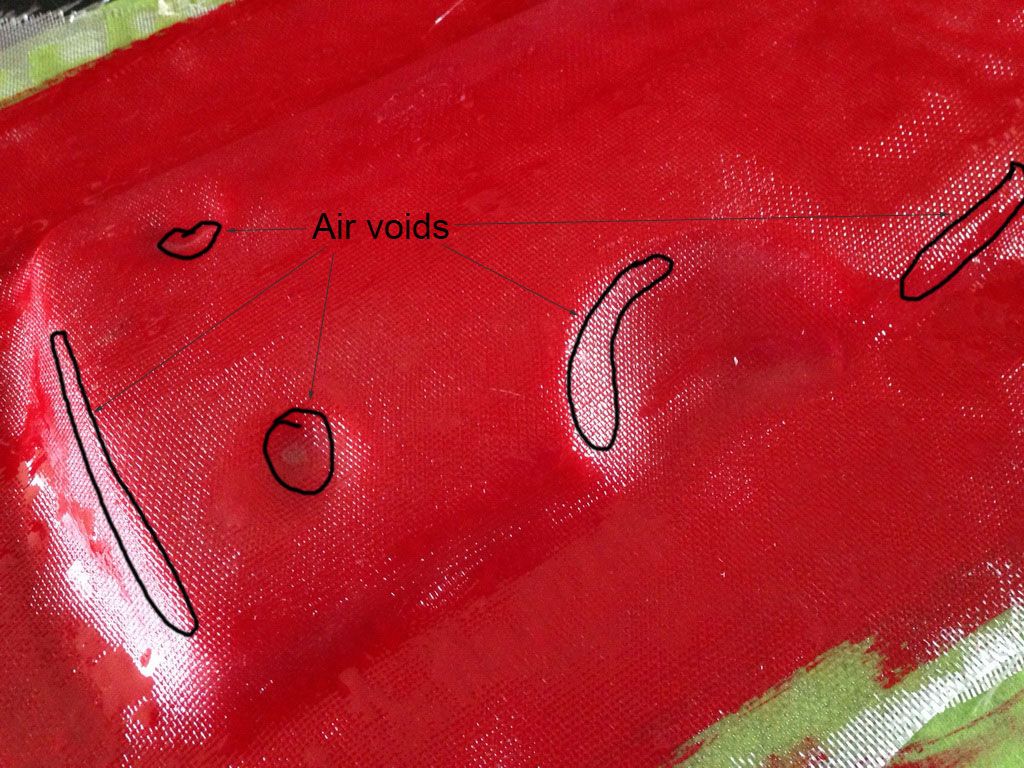 So, I only applied 2 layers of cloth as best as I could, knowing full well that it was not going to cut it, and left it at that to cure for the next few days. Today I pulled the mold apart and as could be expected, it wasn't pretty  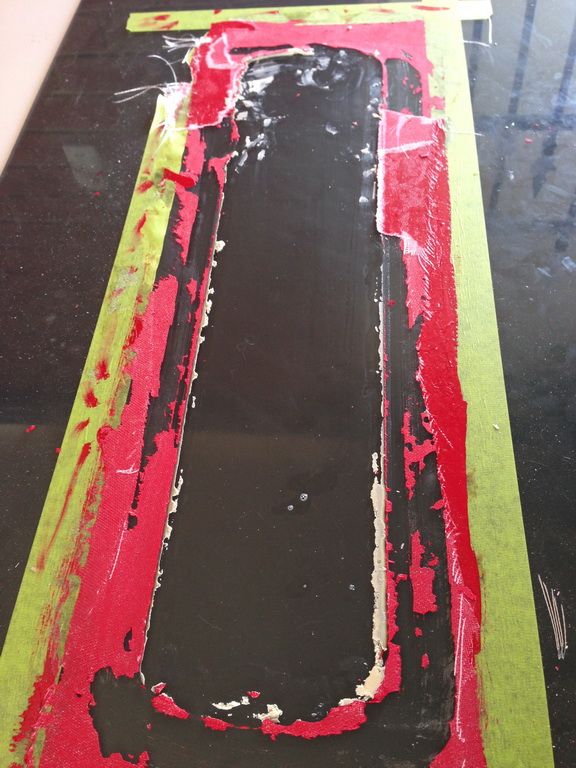 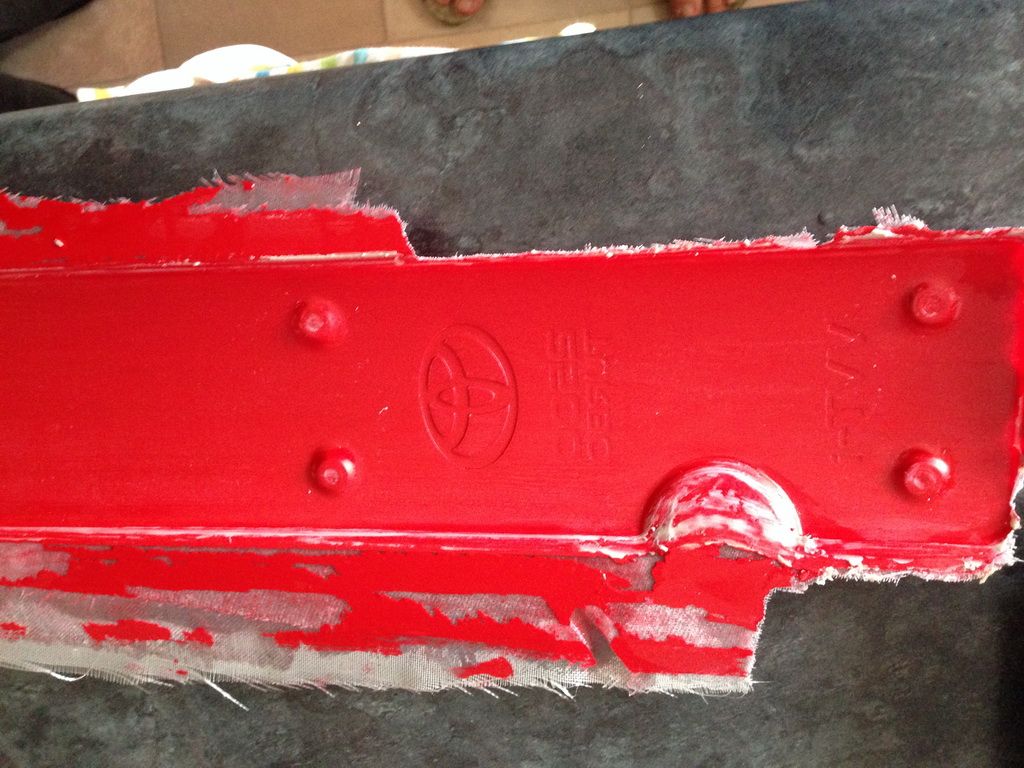 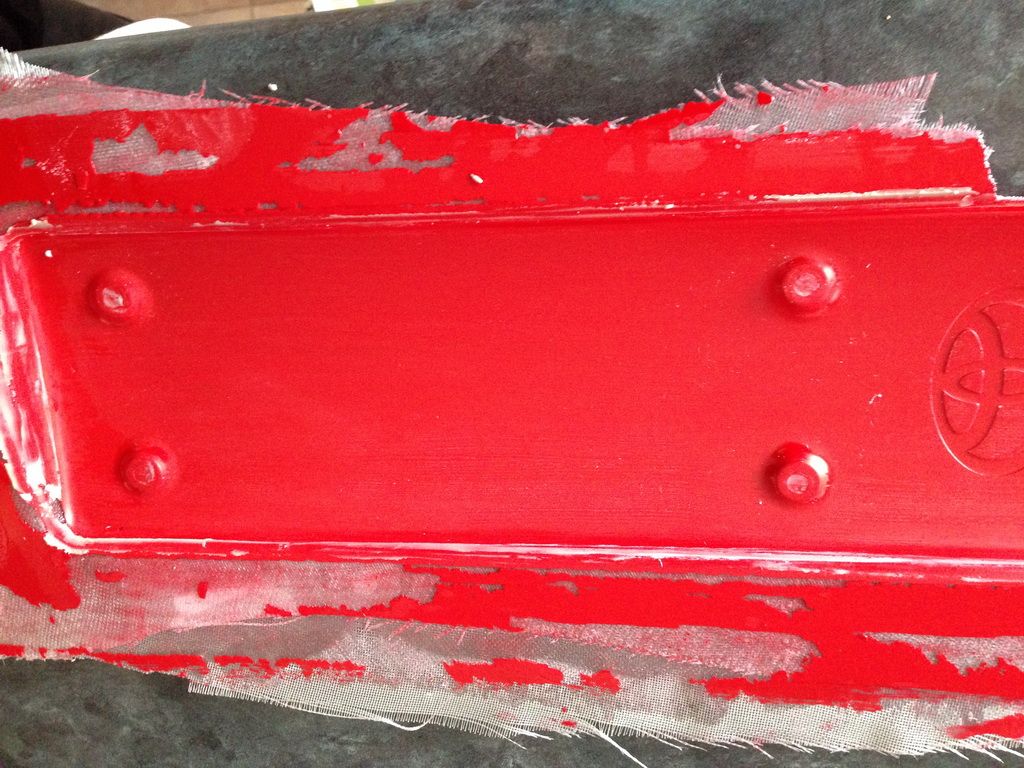 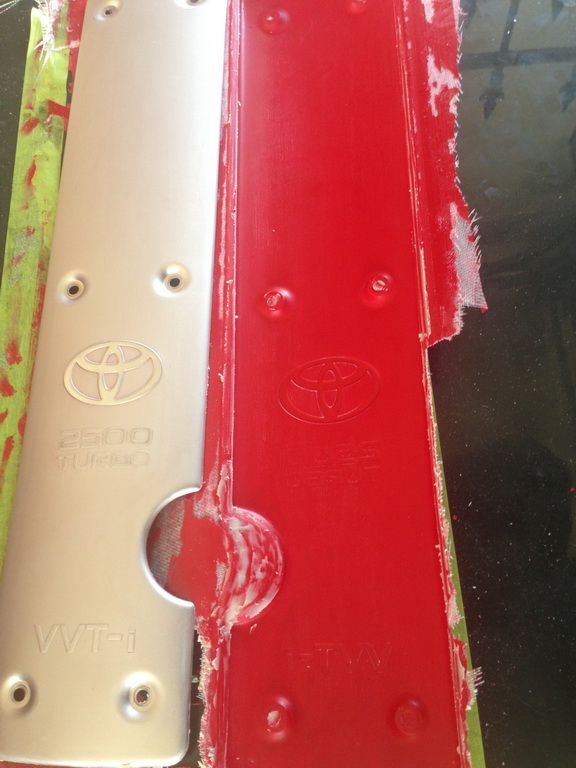 However, once I had the mold separated from the base, my part almost fell out of the mold without any effort so it seems that at the very least my waxing and PVA efforts worked. In any case, I have some observations and some questions I'm hoping you guys could help me with. Looking at the below pic, does my tooling coat look thick enough? 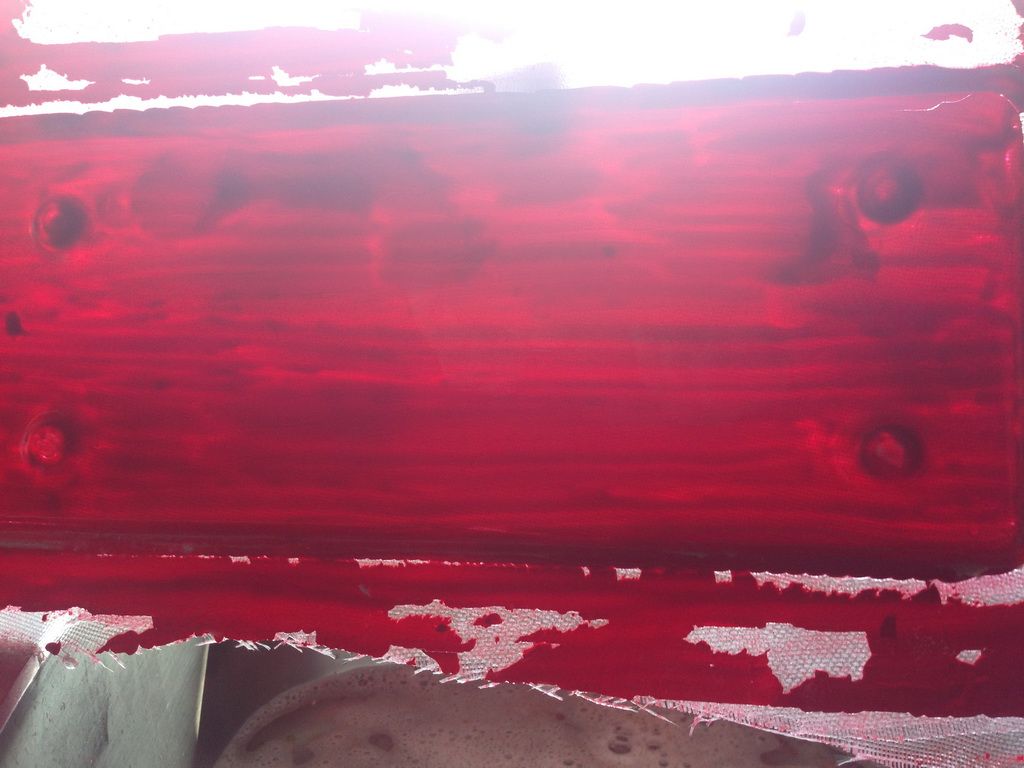 Should I have applied a second tooling coat once the first coat went tacky? I probably let the tooling coat set too much (it was still very slightly tacky but not what I expected) before applying the FG cloth as it looks like the bond between the tooling coat and FG isn't very good. Would I be correct in my assumption? Generally, how long should I wait for a tooling coat to start to set? I'm also not happy with the finish of the mold surface from the PVA. I've tried finding Frekote/EasyLease/Chemlease locally but it's like hens teeth over here  Would applying the PVA in multiple coats and or with a sponge give a better result/finish? |
|
|
|
|
BoostSamurai
|
|
|
Group: Forum Members
Posts: 34,
Visits: 413
|
Also, i almost forgot What would be the easiest way to remove the embossed lettering and logo from the mold. My initial idea was to make a FG copy of the part using the mold, then sand out the lettering/logo from the FG part and make another "clean" mold from the FG part. It seems like a long way to go about it but I can't think of anything else.
JZX World Forums
|
|
|
|
|
winty
|
|
|
Group: Forum Members
Posts: 14,
Visits: 592
|
Good effort for trying The toolcoat is thick enough, I use two coats, usually leave an hour or so between. Usually because of my job I leave the laminating until the next morning, never been any problem First layer I would of used csm and second third mat As for the release I personally just tape on the barrier. Wouldn't bother with PVA. To remove the lettering I would dremmel it out and spot fill it and wet flat it out
|
|
|
|
|
Hanaldo
|
|
|
Group: Forum Members
Posts: 2.5K,
Visits: 28K
|
Unlucky with that, looks like it could have come out ok. First off, my personal opinion is to stick with the cloth. CSM is awful stuff to work with, and it uses 2.5x it's own weight in resin compared to woven cloth which uses it's own weight in resin. So the CSM itself might be cheaper, but you end up paying for it with extra resin. My advice to deal with those indentations for the bolt holes, is to get yourself some microballoons or glass spheres or whatever you want to call them. After applying your gelcoat, mix some microballoons in with a bit of polyester to quite a thick consistency, and then fill those holes with it. Also apply some around the edges of your part, or wherever you suspect you might have trouble with the cloth not wanting to conform. You can then layup your glass straight away, no need to wait for the filler to cure. Second, I agree with winty. Just get yourself some polythylene packaging tape, and put that on your polycarbonate. The PVA won't want to apply nicely to the polycarbonate and will fisheye, leaving you with a not very nice flange surface. Whilst that isn't critical, it's much better to work with nice neat moulds, and the packaging tape is an easy way to go about getting a smooth surface there. Then for the PVA, I used to absolutely hate the stuff when I was wiping it on. I tried brushes, foam brushes, cloths, sponges, everything. But if you are applying it by brush, you're going to get brush marks, and that will show up on your mould. You also can't apply more than one coat when you are brushing, as the solvents in it will dissolve the first layer and you'll end up smearing it around. If you can, I HIGHLY recommend getting yourself some spray equipment. I use a cheap $50 compressor and a $30 spray gun setup. It's wonderful, you can get brilliant high gloss finishes straight off the bat once you get a bit of practice. And there's no chance of your tooling system reacting with incompatible paint surfaces on your plugs. You can also just use something like a Preval system, works fine. Just don't forget your respirator as well, spraying any sort of chemicals is nasty stuff! Personally I don't think your gelcoat is thick enough, but it would probably be fine for a one off part. I always apply 2 coats of gelcoat when using polyester or vinyl ester, just be careful not to apply it too soon as the second layer will attack the first and cause it to alligator. I generally leave the first coat for 2-3 hours before the second, but you should be fine if you do the second layer within 24 hours of the first. And finally, to remove the lettering you are probably on the right track. I always prefer to make a copy and modify that rather than the original. Either way, use a dremel or an orbital sander or something like that to flat the lettering off, then fill any low spots with body filler and high-build primer over the top of it all. Relatively easy to do.
|
|
|
|
|
BoostSamurai
|
|
|
Group: Forum Members
Posts: 34,
Visits: 413
|
Thank you so much for the feedback guys, it all makes a lot of sense and eases my mind. I kind of feel like I'm on the right track but without any feedback, going it alone, is a bit scary I'll definitely try the microballoons idea as it just seems logical as does taping up the base rather than applying PVA. Do you guys think an airbrush setup would be sufficient for spray application of the PVA? That's something I could probably justify purchasing at this early stage and should, I hope, suffice for relatively small parts. It would definitely be less hit and miss than physical application IMO. Further down the line I intend to purchase a decent compressor and gun as I'd like to get into making larger and more complex parts. Next, though, is a decent vacuum setup, once I've got the basic wet layup process figured out.
JZX World Forums
|
|
|
|
|
Hanaldo
|
|
|
Group: Forum Members
Posts: 2.5K,
Visits: 28K
|
Airbrush should work, it will just take awhile to apply.
|
|
|
|
|
George Sychrovsky
|
|
|
Group: Forum Members
Posts: 24,
Visits: 1.6K
|
Looks like a violent rape to me
---------------------------------------------------------------------
Disclaimer opinions of others will vary depending on what they are selling
|
|
|
|
|
ajb100
|
|
|
Group: Forum Members
Posts: 346,
Visits: 4.4K
|
George Sychrovsky (29/06/2014)
Looks like a violent rape to me Erm, ok?
|
|
|
|
|
kidpaint
|
|
|
Group: Forum Members
Posts: 99,
Visits: 676
|
Keep it up! Looks like you're headed in the right direction. Violent rape....what 😳
|
|
|
|
|
BoostSamurai
|
|
|
Group: Forum Members
Posts: 34,
Visits: 413
|
Thanks guys I'll get some more supplies (microballoons etc) and give it another shot soon. It's fantastic when people post up their successes but I think it's also useful for noobs like me to post up the failures as well, that way others can hopefully learn from our mistakes, rape or no rape
JZX World Forums
|
|
|
|