|
Emil_L95
|
|
|
Group: Forum Members
Posts: 5,
Visits: 42
|
So, yes im all new to this forum, and just saw the 'Hot to make a car hood/bonnet' on YT, and they talked about this forum, so i thought ill ask here. Im going to make a Ducktail for my 1990 SW20 MR2, and i thought ill ask for some tips and tricks here. Wanted result: 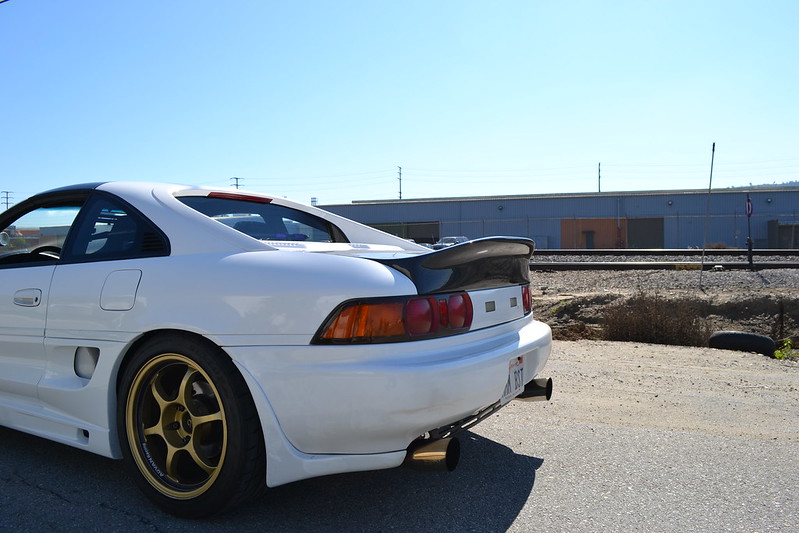   Well, you get the point of what i am going for. Im not thinking of making a complete bootlid, as i dont have money for making it (student), so im thinking of 2 things: 1. Making a 'addon' to the original bootlid (like s13, s14 and s15 ducktail from TRA_Kyoto) Like this:  OR 2: Making a 'cover' for the bootlid. What i thought of was, sanding down the OEM bootlid, and making a thin 'layer' over the bootlid (and making a foam shape of the ducktail) I will be making it of fibregalss as carbon is too expensive  (yes i am poor) (yes i am poor)
Soooo, anyone have some protips for the making of this? (I would buy the MadPSI trunklid, but at $750, before shipping, taxes into norway and so, its just too much for me :S)
Emil Leirud (The noob)
__________________________
|
|
|
|
|
FLD
|
|
|
Group: Forum Members
Posts: 468,
Visits: 2.7K
|
Welcome along  Obviously the easiest way to do this would be to borrow one and copy it (bit cheeky). However, the next best thing is to make something the right shape on your existing boot lid and mould from that. Bear in mind it might ruin the paint. What you could do is replace just the skin of the bootlid. I did this on a mk2 escort ( added bodged on an RS3100 ducktail), took a mould, made a new skin in glass, cut off the old skin and bonded on the new skin. Swapping just the skin saves a fair amount of weight and retains all the OEM fittings. Cutting off the old skin is easy, just sand the folded over lip off with a grinder. Leave the new skin in the mould so its not twisted and bond in the old frame.
|
|
|
|
|
wildcard
|
|
|
Group: Forum Members
Posts: 40,
Visits: 406
|
I laughed so hard when I read this post. I laughed because I did everything that you are doing a year ago. I even started with that S13 Rocket Bunny wing, and eventually swapped over to a CSL style ducktail wing that I have perfected and sell today. In fact, I have to make one today. Here was the build page http://www.svtperformance.com/forums/showthread.php?942280-Ducktail-nascar-spoiler-for-99-04-mustang/page8and here is the finals:  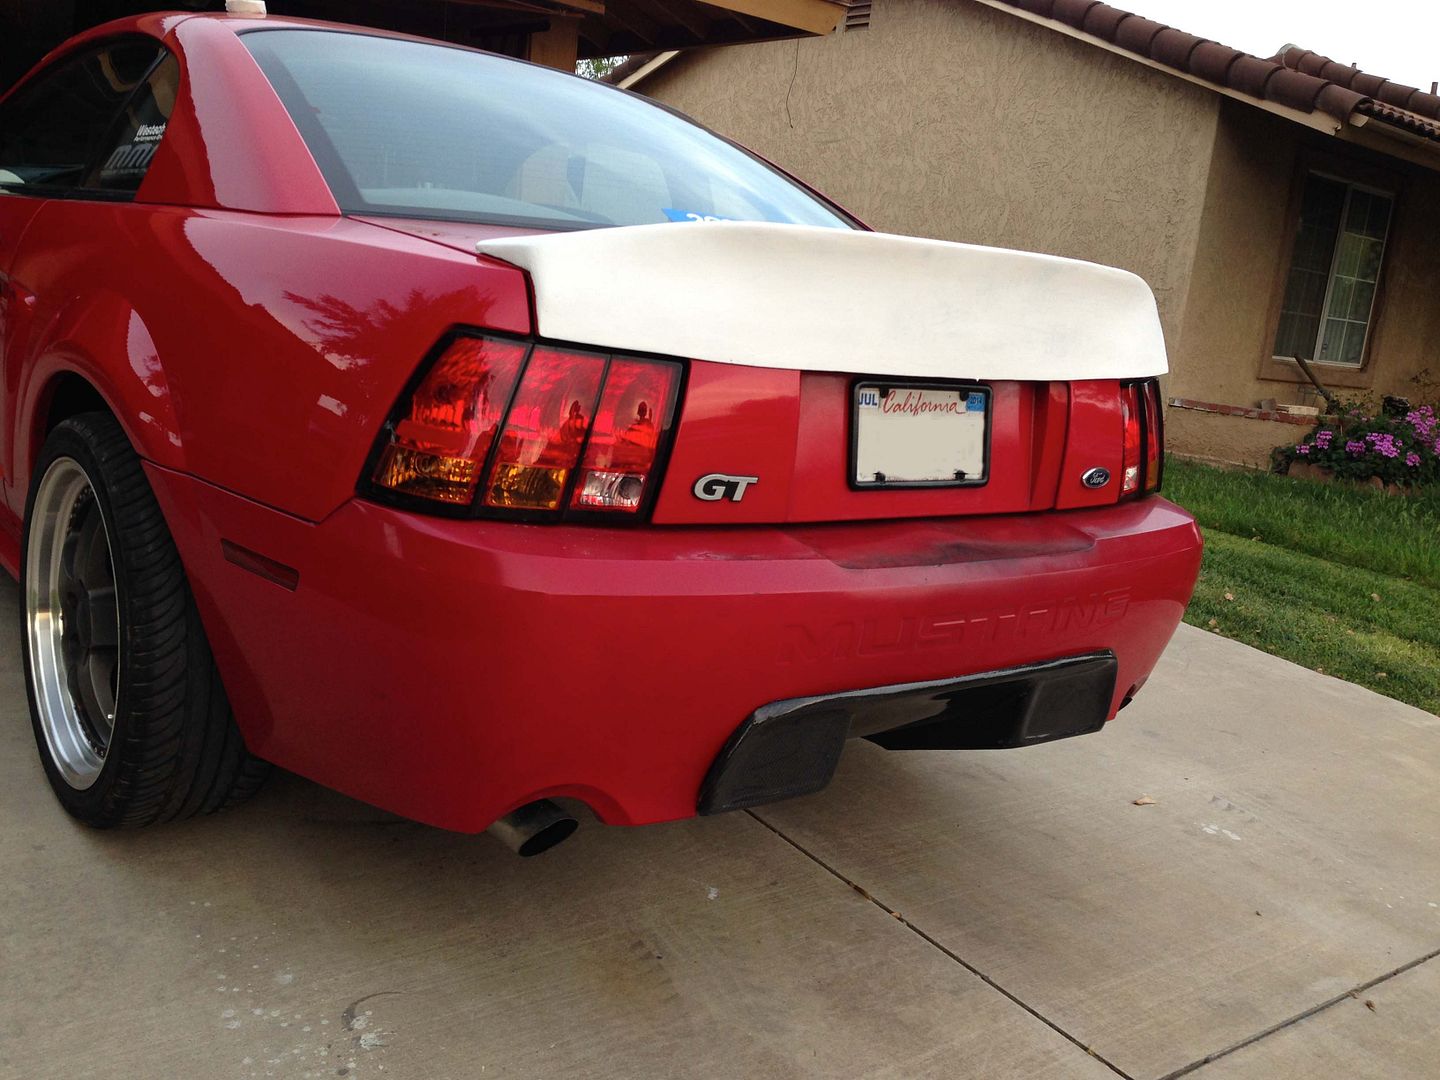 http://www.btifab.com/99-04_ducktail.htmlThe way to do it is to first buy yourself a shape. There are many CSL style wings that you can get off of ebay for $60-100. Buy one. Don't worry about the sizing because you will have to change almost everything except the basic ducktail shape. Once you get it, if it is too small, then cut it in two—right down the center line. If you want to first try your hands at making molds, then make a simple mold of the center section. Make sure it is large enough to give you the inches that you will need to add to widen the wing (if your wing is too small). Then make a part out of the small center section mold. After you have the part, cut it to shape and hot glue gun/hot melt it to the wing. After you have the length correct, you will need either pieces of fiberglass that you can cut to start making the shape of the trunk attachment. I usually cut scrap fiberglass and hot glue them into position making the wing sit flush with the trunk. After I have the shape, I fiberglass those pieces into the wing, so that my plug is hard. After I have all of the shape put together, I use bondo/body filler until I am happy with the shape. When I'm done shaping, I spray on polyester primer, and sand. Then I am ready to make a 2 part mold (3 part if you add the bottom lip/trunk attachment to the wing). After I have my mold, I just infuse the part. I build them in either fiberglass or carbon depending on the order or my desire. You can also vacuum bag this part. I built the first versions that way. If you don't have any air tools, you may want to buy them because this is so much simpler when you have a dual action sander and a small air orbital sander.
|
|
|
|
|
Emil_L95
|
|
|
Group: Forum Members
Posts: 5,
Visits: 42
|
Thanks for the tips, i think ill go with th CSL style, and costumize it. Luckily i sold the old MR2 engine today (£250) + a friend owes me £200, so maybe ill start this project sooner than thought
__________________________
|
|
|
|
|
brainfart
|
|
|
Group: Forum Members
Posts: 198,
Visits: 1.4K
|
What i thought of was, sanding down the OEM bootlid, and making a thin 'layer' over the bootlid (and making a foam shape of the ducktail)
Naaah...
Apply a layer of clear packaging tape on the bonnet where you want to attach the ducktail. Cover the rest of the surrounding car with release agent or car wax and some plastic sheet. Then lay up a few layers of fiberglass on the packaging tape. This will be the underside of your duck tail. Attach a big chunk of foam and saw and sand to the desired shape. It's really easy, just remove everything that looks like it doesn't belong there  . Apply fiberglass on its surface, filler sand spray paint etc until it looks good. The resulting plug is then either used to create molds, or it is reattached to the car and left there.
|
|
|
|
|
Hanaldo
|
|
|
Group: Forum Members
Posts: 2.5K,
Visits: 28K
|
Exactly the process that I am currently using ^
Works well, just make sure you measure, don't trust your eyes to tell you that something is symmetrical...
|
|
|
|
|
Emil_L95
|
|
|
Group: Forum Members
Posts: 5,
Visits: 42
|
brainfart (09/05/2014)
What i thought of was, sanding down the OEM bootlid, and making a thin 'layer' over the bootlid (and making a foam shape of the ducktail)
Naaah...
Apply a layer of clear packaging tape on the bonnet where you want to attach the ducktail. Cover the rest of the surrounding car with release agent or car wax and some plastic sheet. Then lay up a few layers of fiberglass on the packaging tape. This will be the underside of your duck tail. Attach a big chunk of foam and saw and sand to the desired shape. It's really easy, just remove everything that looks like it doesn't belong there . Apply fiberglass on its surface, filler sand spray paint etc until it looks good. The resulting plug is then either used to create molds, or it is reattached to the car and left there. You sir. Are a genious! Hats off! 
__________________________
|
|
|
|
|
wildcard
|
|
|
Group: Forum Members
Posts: 40,
Visits: 406
|
Looks like you got the info that you were looking for. I'm sure we all look forward to seeing what you build.
|
|
|
|
|
Hanaldo
|
|
|
Group: Forum Members
Posts: 2.5K,
Visits: 28K
|
One thing I am doing differently is I am drawing the shape of the duck wing that I want, and then cutting that shape out of balsa wood. This will give me a profile of the shape that I want that I can trim the foam down to, and will be much easier to create the part symmetrically.
|
|
|
|