|
ARSOUILLERB26
|
|
|
Group: Forum Members
Posts: 16,
Visits: 122
|
Hello everybody, I contact you for a few problems about a carbon kevlar tray I ve made URL=http://imageshack.us/photo/my-images/707/40791410150587709709216.jpg/]  [/URL] My first problem is for me a real nightmare: tiny bubbles:   I eliminated a lot them by using resin infusion (but not all of them) and using bristle roller but to have a perfect finish, I don't see any other way than to varnish (if there is an other possibility please let me know) So I would like to know how to make this perfectly, what products do you use (I didn't see them on your shop) and the application method to have a perfect gloss finish . For my second question, I've done this tray with 2 layers of carbon kevlar and with 2 of red traced carbon ^^ in the middle but it's too flexible specially on the flat part.    I would like to know if it's possible for a next one to make it more stiff by putting a kevlar cross in the middle of the reinforcement layers Throughout the flat part and if it will be (for just one kevlar layer) visible on the exterior of the tray? Or if is it possible to make the tray for stiff by an other way (curing?) cheaper than to put 2 or 3 more carbon reinforcement layers. By advance, thank you for all your answers 
|
|
|
|
|
Warren
|
|
|
Group: Administrators
Posts: 214,
Visits: 783
|
strange you have pin holes/bubbles in your surface.
With infusion, if done correctly you should get no pinholes so something has gone wrong with your technique.
Are you 100% sure you havent had a tiny leak??
youve done a correct lay up of infusion mesh etc???
perhaps slow down the infusion by throttling the resin flow with a line clamp slightly. Sometimes the resin can blast through really quickly and not soak through all the laminate.
a simple way to stiffen it up relatively cheaply is to use a foam core/lantor soric on the flat part. If its cut exactly to shape and the edges of the foam core sanded to a point before laying up then it should be hard to see the core.
You can also stiffen it slightly by post curing the part in an oven.
|
|
|
|
|
Joe
|
|
|
Group: Forum Members
Posts: 310,
Visits: 1.5K
|
Salut Arsouille, First, nice idea, I'm jealous, really  I noticed you said "I eliminated a lot them by using resin infusion and using bristle roller".... Unless there's a technique I'm not aware of, there is no need to use a bristle roller when making resin infusion... Did you just wet your fabric and then pull vacuum (vacuum bagging method) or did you vacuumed dry fabric and then pull the resin (resin infusion method)? Sorry for what could be a dumb question, but its to be sure of the process you used. Then it could make a difference in explaining why those bubbles.
 A $1000 electronic device will always protect a 10 cents fuse A $1000 electronic device will always protect a 10 cents fuse
|
|
|
|
|
MAVERICK
|
|
|
Group: Forum Members
Posts: 27,
Visits: 39
|
Yeah I think we need a little more info on how your making it to work out what going wrong... you coudl stick a core material like PVC foam or Soric into the base of the part to stiffen it up without adding too much weight... to reduce the twist you could turn the fibre through 45 dgerees that should help there... all this to make waitresses that little bit faster! 
|
|
|
|
|
ARSOUILLERB26
|
|
|
Group: Forum Members
Posts: 16,
Visits: 122
|
hello First, thank you for your answers I will try to be as accurate as possible. @warren yes, I was sure I didn't have any tiny leak because before to start the infusion, when I made the vaccum, once clamped, I waited 20/30min and the pressure mano didn't move. I verified with an ultrasonic detector: same result and 2 days after, just before to unmould: I saw the pressure level, it didn't change Yes I putted a infusion mesh lay up, I pulled at -0.8bar with the easy composites regulator (I saw many composites workers don't pull at full vaccum) but I didn't use a line clamp to partially reduce the resin flow. If it can help, I mixed too much resin to be safe and I clamped the resin entry very late (just before the resin started to go inside the catch pot) I'm really interrested about the core material, I'll try as soon as I can, is it only usable on flat part or on any form (for infusion) About curing, can it be done a long time after the lamination or just after? (this tray was made 2 weeks ago) @Joe Thank you very much Joe, happy to make you jealous ^^ do you enjoy this one?  I read my description again and it was not very accurate, I made the tray with resin infusion. I talked about the bristle roller for hand laminate, a nice weapon versus tiny air bubbles ^^ @maverick I don't see what else informations you could need, but if you have any questions about my "technique", don't hesitate ^^ Anyway, nobody know what is the correct technique to make a good varnish now to erase that horribles air bubbles? varnishing I suppose but how and with what products? Thank you very much 
|
|
|
|
|
Kevin-Lee
|
|
|
Group: Forum Members
Posts: 44,
Visits: 2.4K
|
If your only getting -0.8 bar you are not at full vac, follow the EC instructions/video!
ABSOLUTE vac is needed for the infusion, you are technically going to "degas" the resin in the bagging stack and this can be observed by the bubbles in the bag moving faster than the resin. If you pay close attention to the feed and vac pipe/connector blocks you will see almost no bubbles collecting around these areas or in the pipes within the clamps if done correctly! Also pay attention to the areas that have 3 layers of mesh, usually at the feed and/or vac connections, almost no bubbles should be in these areas too, this will be a good indicator as to the final product.
I have just done an infusion with tinted blue resin and white diolen to show the process/bubbles clearly... I will post some pics soon...
Small pinholes can be fixed with the correct colour wax crayon, for carbon/diolen/carbon kevlar use black, it will not be a perfect solution but will stop dust and moisture from filling the voids and making the problem worse. Obviously you wouldn't do this on a performance part, but for a quick fix on a small household part this should be better than throwing it away!
Cheers,
Kev.
Update:
See pics. Notice the diolen is photographed in the negative and any imperfections/pinholes/voids would show as black spaces or dots... But its clean!
Also note that the area around the vac connector block is free of bubbles, as was the feed connection area , this was made easy to observe with the blue resin...
|
|
|
|
|
Joe
|
|
|
Group: Forum Members
Posts: 310,
Visits: 1.5K
|
Hi, The full carbon one looks nice too... Thats great. And thx Kevin for additional informations and pics.
A $1000 electronic device will always protect a 10 cents fuse
|
|
|
|
|
Warren
|
|
|
Group: Administrators
Posts: 214,
Visits: 783
|
as said you need FULL vacuum on the guage.
rather than clamping the feed as the resin gets to vacuum line, make sure you mix some excess and allow some resin to bubble up the vacuum line into the catch pot. That way you are ensuring resin has reached all of the part.
Also once happy, clamp the resin feed then about a minute or two clamp the vac feed after. vary the time depending on when the bag goes tight around the resin feed area. that way you ensure there are no tiny bubbles trapped in the fabric or from the resin as youve sucked through a good slug of resin through the part.
Also ensure you leave your fresh mixed resin to degas or degas it in the catch pot. What may seem a 2mm bubble in the resin goes into the part and "explodes" under vacuum into a much bigger volume.
You can fill the pin holes using multiple layers of lacquer. You generally need a thicker layer to fill the holes which is not ideal.
a better solution if there are not too many pin holes is to use a bit of fresh mixed resin and fill them with a pin and a drop of resin. Then gently sand it smooth before you lacquer the part.
if you use a foam core, the cores can be bent around slight curves with a heat gun but probably not on your tray as its too sharp. You could try the soric core material as its more flexible.
I think with a foam core on the bottom you should be ok.
|
|
|
|
|
Matt (Staff)
|
|
|
Group: Forum Members
Posts: 680,
Visits: 1.9K
|
Hi Arsouille,
I think the advice you've received from our forum members in this thread is exactly right. Firstly perform your infusion at full vacuum. If you have a vacuum regulator (nice and useful product) you should be using it for applications like vacuum bagging or vacuum bonding, not infusion, which you need to be doing at full vacuum.
Secondly, make sure you're running slightly resin rich by clamping off the vacuum line soon after you clamp off the resin feed line. This will significantly reduce the chances of any air bubbles.
Regardin the stiffness of the part, a core material is certainly the way to go on this one. What you need in your tray is deflection strength and the best way to acheive that is to create thickness - the best way to do that, without adding lots of weight and cost (of solid carbon or kevlar laminate) is to include a core material. If you use Soric you'll have a slightly denser core than you could have using something like a PVC foam core but you will find it very easy to work with. If you use a closed cell foam then you'll need to drill it all over (2mm holes and 15mm centres) so that the resin can get from the top surface (where the mesh and peel ply are) down onto the surface.
The other thing you might want to consider is the orientation of your reinforcement. In your photograph you are demonstrating how easily you can 'twist' the tray. This is 'torsional stiffness' and will be considerably less then the stiffness across the width and the length of the tray if you have oriented all of your fibre at 0,90 (i.e. with the weft and warp in line with, and perpendicular to, the tray). If you rotate some of the inner layers by 45 degrees then you will improve the torsional stiffness of the tray, at the expense of some of the 0,90 stiffness that you have now.
I hope this helps.
--Matt
Matt StathamEasy Composites / Carbon Mods - Technical Sales
|
|
|
|
|
Warren
|
|
|
Group: Administrators
Posts: 214,
Visits: 783
|
the tray is something that could go with my dinner plates once i do another batch!! 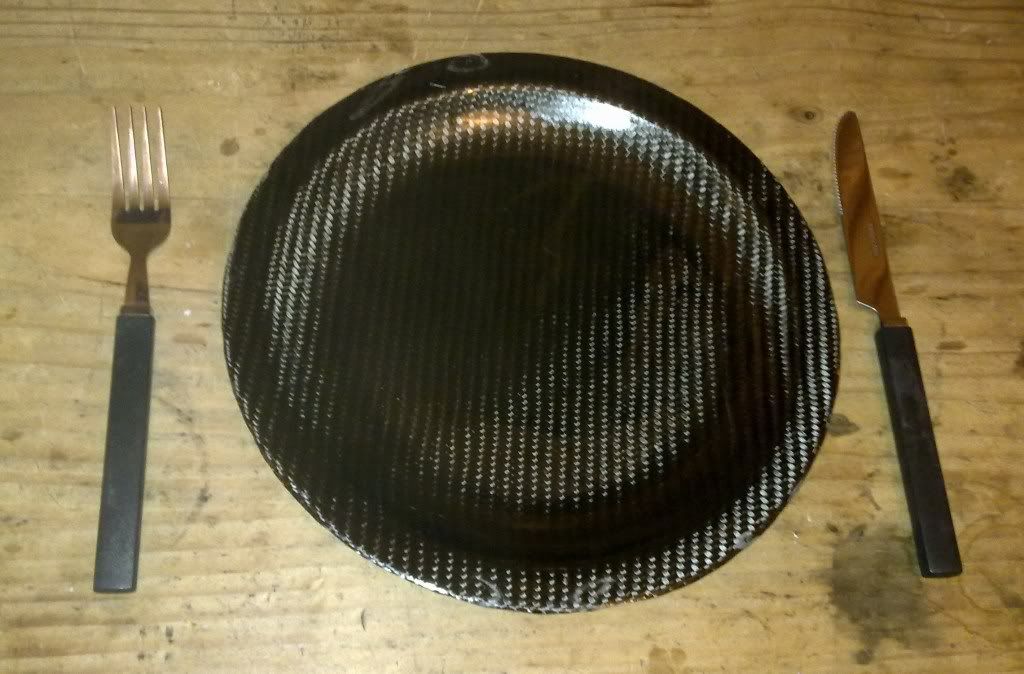
|
|
|
|