Releasing the mould


Author
Message
Bollah
Bollah
Junior Member (24 reputation)Junior Member (24 reputation)Junior Member (24 reputation)Junior Member (24 reputation)Junior Member (24 reputation)Junior Member (24 reputation)Junior Member (24 reputation)Junior Member (24 reputation)Junior Member (24 reputation)
Group: Forum Members
Posts: 4, Visits: 7
Hi everyone.

I'm new to all of this carbon fibre and came across the video's on youtube and thought it looked easy, seems I was wrong on that front! Ermm

I bought the putty making kit to make a mould of a spark plug cover and had issues trying to release the part from the mould and ended up breaking it in various places. The video's make it look easy!

Anyway, hopefully someone can help / advise me on what I did wrong please.

So, I started with the barriers around the edges etc..

http://img.photobucket.com/albums/v11/begbie/IMAG0220.jpg

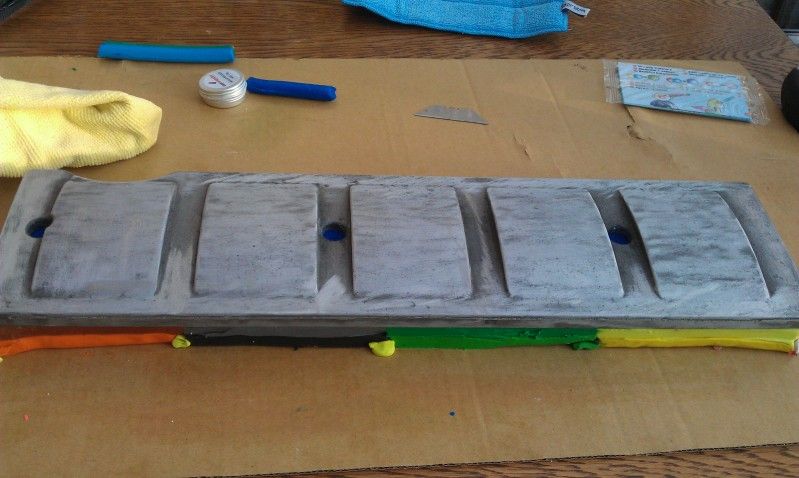
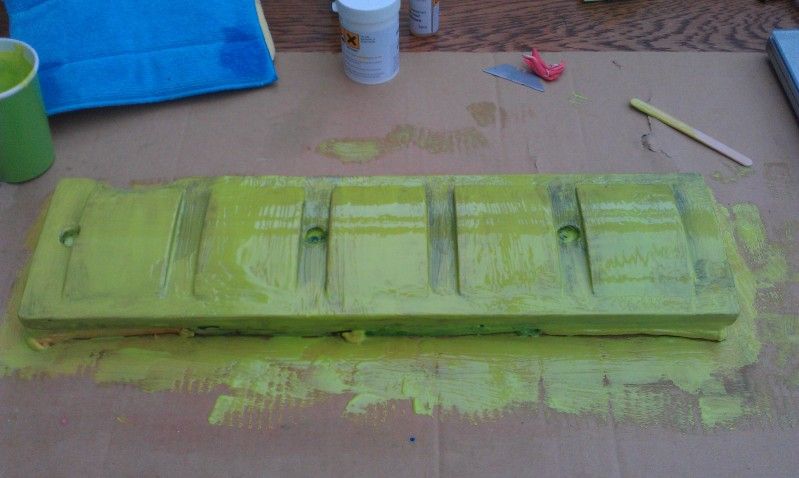
This was then waxed 6 times and the PVA agent was applied on top. I then added the epoxy gel


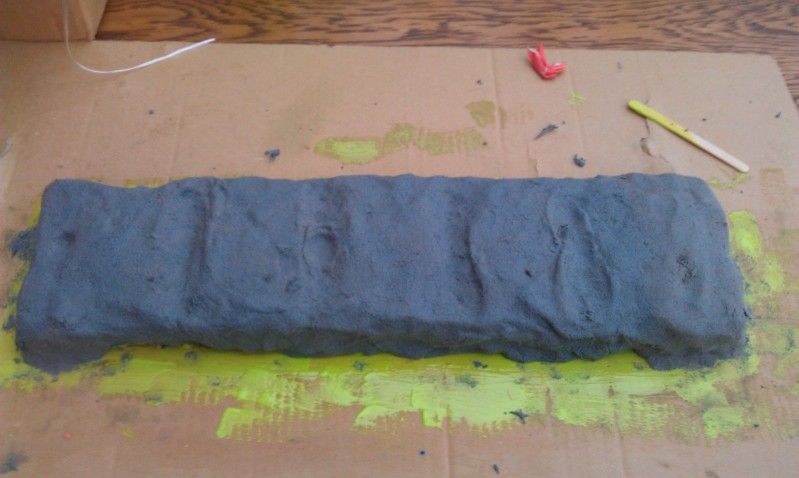
Then added the fibre putty


And the final result


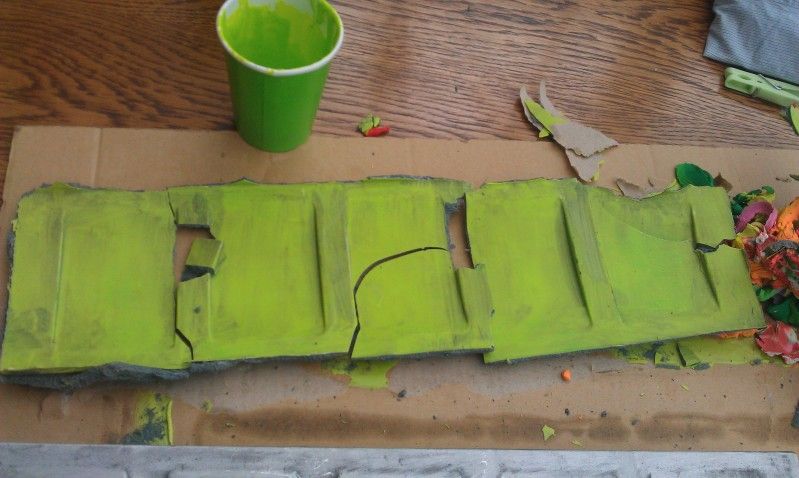
Now looking back at the photo's, I think I might have not put enough epoxy gel on, as it looks light in some places and I also think I left the putty too thin in some places.

I also had issues trying to release the part, so maybe I didn't use enough PVA on it?

Thoughts and opinions would be welcome Smile
Reply
Bollah
Bollah
Junior Member (24 reputation)Junior Member (24 reputation)Junior Member (24 reputation)Junior Member (24 reputation)Junior Member (24 reputation)Junior Member (24 reputation)Junior Member (24 reputation)Junior Member (24 reputation)Junior Member (24 reputation)
Group: Forum Members
Posts: 4, Visits: 7
Warren (22/06/2012)
From the picture there is a lot that appears to have gone wrong.

1) if you use cardboard then it must be covered in flash tape or similar so it doesnt stick to the resin. Parcel tape or selotape you have knocking round the house will be fine, but dont forget to release coat it with wax and pva.

2) The fileting wax/plasticine you have used is applied incorrectly.  You need to create a smooth sealed curve between edge of the part and the flange. The wax is there to prevent mechanical lock by 2 methods: a) resin bleeding under the wax and b) smoothing sharp edges and overhangs that can cause physical mechanical lock.  An easy way to create the suitable curve is to make a 5-10mm sausage of wax/plasticine, press it into the edge then use the end of your finger to make a smooth curve. You can buy fancy ball shaped filleting tools for just such a purpose, but your finger is free.

3) Not sure about how you release coated the part, but follow the instructions to the letter and you will be fine.

4) your gel coat was way too thin. Supposed to be approx 1mm thick.  You can do 2 thin coats or one thick coat.

5) if youre worried about it breaking again, you could embed some thin wooden sticks into the putty, but in reality you shouldnt need to for most cases. Remember you need 10-15mm thick of putty.

6) remove your flange and part gently once cured. 

Its a learning process and you will get there in the end. The part you are making should be possible in carbon so its just the technique you need to refine.


Warren, I appreciate the time taken to reply to me with those useful tips. I'll give them a go and hopefully the 2nd attempt is better than my first attempt BigGrin Also, thank you to R0bsk1 as well Smile
GO

Merge Selected

Merge into selected topic...


Merge into merge target...


Merge into a specific topic ID...


Similar Topics

Reading This Topic

Explore
Messages
Mentions
Search