By ajb100 - 1/4/2014 11:09:15 PM
Hi guys, thought I'd share a repair I'm doing at the minute and get an opinion on the method I'm using.The repair is on a front splitter and rear diffuser that got damaged in a crash. The front splitter has been pretty badly damaged on one side and was beyond repair. Luckily the team had another splitter which had been smashed up on the other side. So the plan is to trim the good side off one splitter and attach it to the other to make one good one from the two. The old splitter 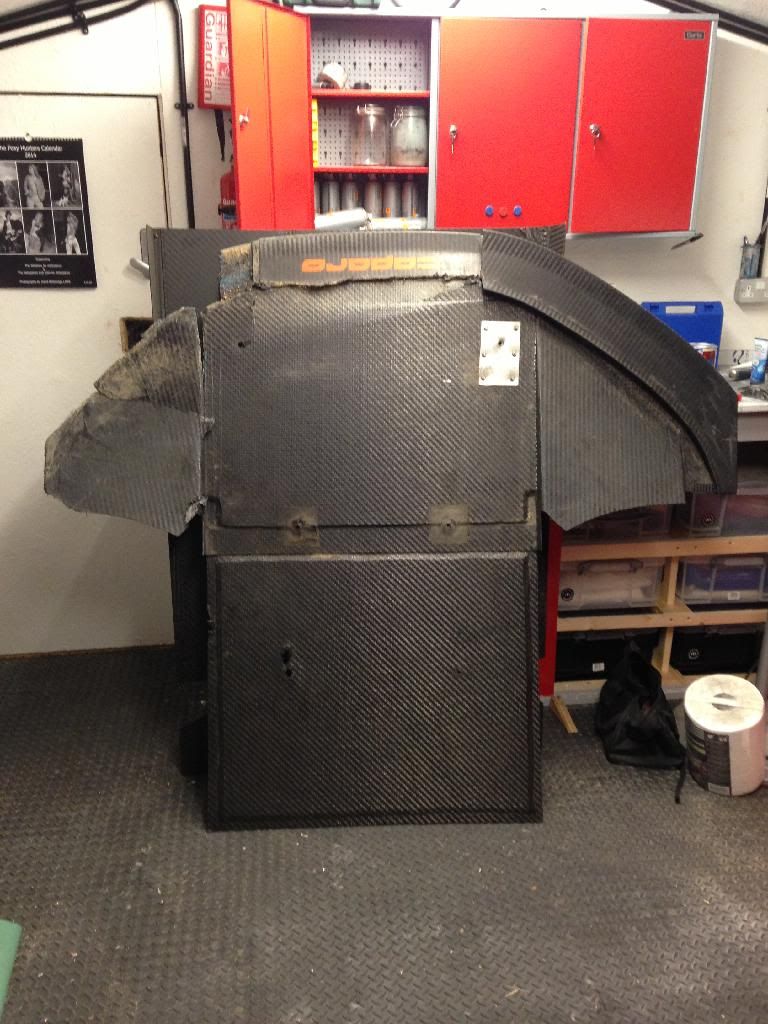 Splitter to be repaired  The splitter to be repaired had a lot of hidden damage once I started looking at it in detail. The length of the splitter is made of two pieces bonded together, which had started to crack apart  And there were multiple other joints that had started to separate  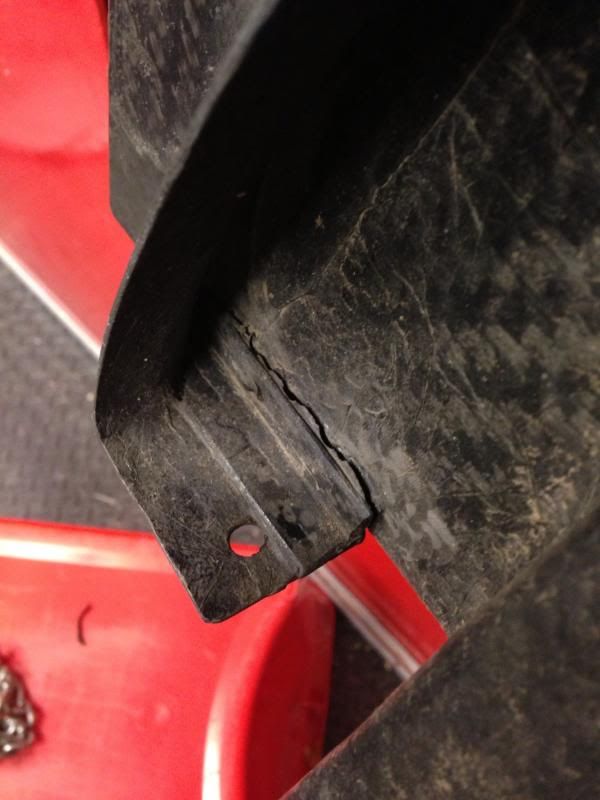 Once I'd decided what was getting cut off/saved/transferred, I needed to make a mould of the splitter lip as it was going to get cut up and needed a section to replace it. First up was to flange it and a couple coats of easy lease 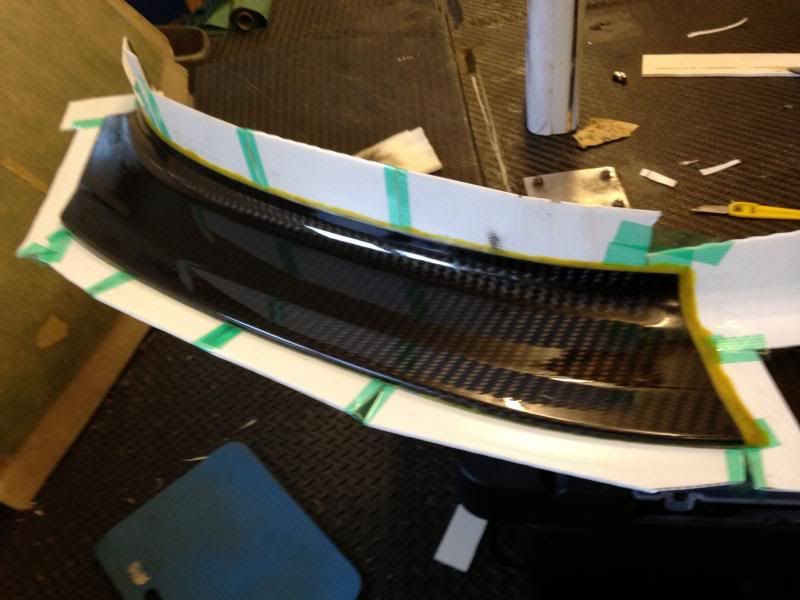 Then to lay up a mould 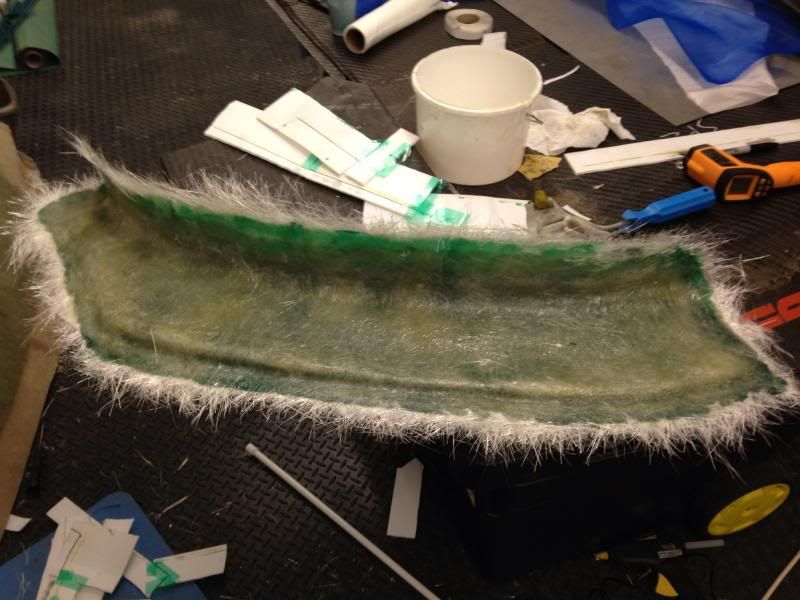 Once I'd de moulded, it was time to try and make them a bit more manageable and prepare for the cutting so time to try and split the splitter along the cracked joint 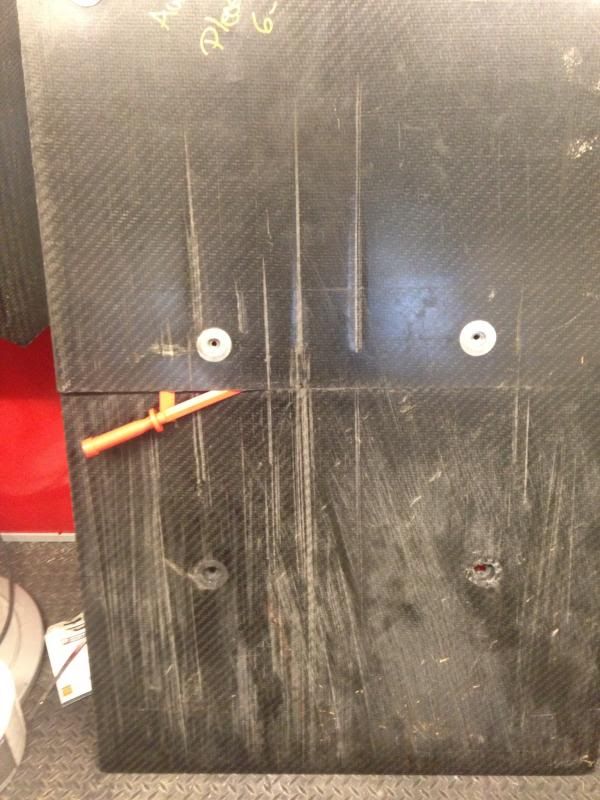 Once seperated, I was surprised how shoddy the adhesive had been applied, especially coming from Caparo. Two massive air voids on the joint  Next was to cut off the damaged and good sections and check fitment with the splitter to be repaired. 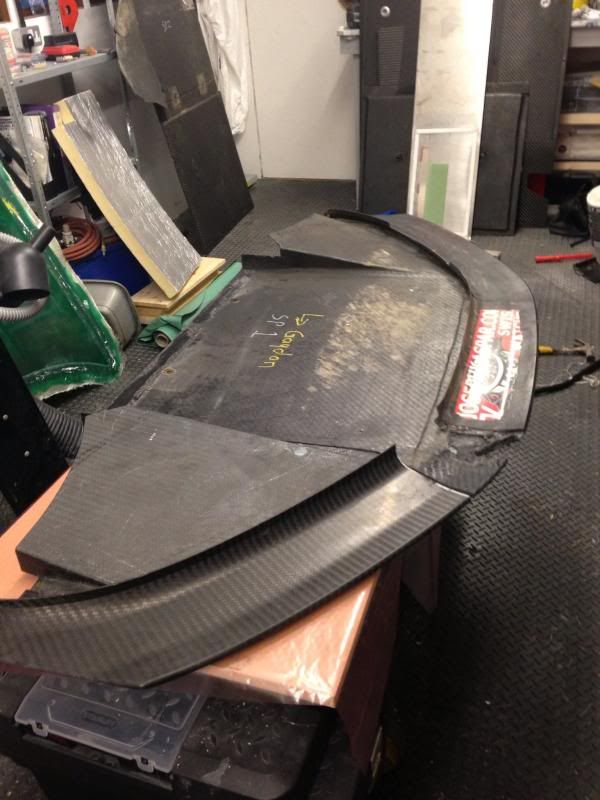 The plan for the repair is expertly shown below in a drawing from my ipad and I'd be interested in getting people opinions on it.  Because the parts are all honeycombe cored and there is a large number of forces on this, I wasn't happy with just bonding the bits back together and relying on the strength of the glue. The black lines are the original carbon layers, with the shaded yellow being the honeycomb core. The red lines are new layers of 450g carbon and the green is foam core. The top two layers will be made separately and then bonded in with adhesive. The final top layer of carbon will be vac bagged on. Once all that is finished, I'll flip it over, clean up the join line underneath with a little groove and fill with adhesive (blue in the picture) So the join line was exposed  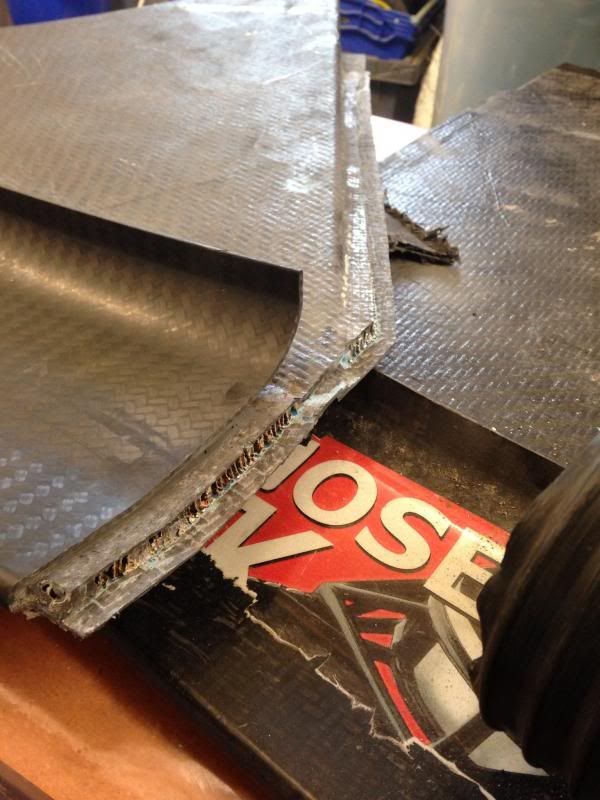 And the two pieces placed side by side  I've done the first two layers of carbon and put in the core, but haven't got a picture at the minute
|
By ajb100 - 3/19/2014 9:14:10 PM
Thanks, I quite enjoy repairs, they're a different mind challenge from the norm
|
|