Car trim parts coming along nicely


Author
Message
Alibro
Alibro
Supreme Being (200 reputation)Supreme Being (200 reputation)Supreme Being (200 reputation)Supreme Being (200 reputation)Supreme Being (200 reputation)Supreme Being (200 reputation)Supreme Being (200 reputation)Supreme Being (200 reputation)Supreme Being (200 reputation)
Group: Forum Members
Posts: 44, Visits: 384

Edit Apologies guys,this is a long one

Hi guys

I have been reading this forum a lot recently since becoming interested in making carbon fibre parts. I have been slowly learning how to make moulds and today I pulled my first successful (mostly) CF part. My methods are not the best yet but every time I try I learn something new. This is what I am doing.

I bought a MGF last year (mid life crisis) and have been doing wee jobs to it ever since.

I already wrapped the instrument binnacle in CF. This is an early effort at making a mould.


Lots of things wrong with this but it worked well enough for me to make a new part,


I was happy with the new binnacle as the original was broken and needed replaced but it was very reflective and after seeing a CA video of How to Wrap in CF I decided to give it a go.


This worked pretty well and gave me a taste for more CF parts so I decided to try to make some door trims.

This was my first attempt at the mould. As you can see in the photos one side is at a different level to the other and both sides are gently curved henceit can't just be stuck down on a flat piece of plastic.


At least two things wrong with this one. First the curved part has a very sharp edge which I should have realised was never going to release properly.

Second I didn't seal the edges with filleting wax so the resin got under the edges and locked the plugs into the mould. I had a lot of trouble getting theplugs out and damaged the edges of the mould.

Attempt two I used clay to make a support for the plug.


Covered it with foil and made the mould, this one was nice and easy to remove as I also trimmed some of the sharp edges off the plug (unseen bits which are not 100% necessary). Only issue with this one was I wasn't accurate enough with the clay along the long edges so that after the clay was removed the plug sat proud of the mould, also the foil left big ridges in the gelcoat.


So now I had two moulds one damaged around the edges and the other too low at the edges, so I decided I had nothing to loose and had a go at fixing them. I stuck brown packing tape around the edges of the plugs and pushed them into the mould, then I used (please don't laugh at me too loudly) car body filler to raise the sides of the second mould.

This is it after I sprayed it with several coats of rattle tin lacquer and then sprayed with PVA


The second one I tried repairing with gelcoat, it was only as I stood looking at the job I had done it suddenly dawned on me I hadn't put any wax in the gelcoat so it took several days to go off and even then was still tacky. Doh!

This is it with some filleting wax in the area where the plug locked around the curved parts damaging the mould.


Sooo

Now I had two moulds ready and decided to try and follow the CA videohttps://www.youtube.com/watch?v=IAdVO8Rkv6c

For this attempt I used the mould which had the filleting wax, I painted the resin (Gurit SP106 laminating resin) onto the mould and waited for it to go tacky then started laying the CF. Thankfully I decided to do one side at a time as half way through laying it the resin started to go off.I quickly made up a second batch and finished laying the CF. I wasn't 100% happy with how tight it was in the corners but did it the best I could and left it overnight.

Next day it pulled from the mould easily enough but as I feared the edges were a mess.Sad


I think I may have waited a bit too long before placing the first layer of CF or maybe the corners of the mould are too sharp and the CF sprang out but I decided for the second mould I would make some changes.

I think 4 layers of CF is overkill for a non structural part so I bought some 195GSM GF Woven Roving,

I also bought some slower hardener to give me more time

And last I decided to use one of these

http://www.ebay.co.uk/itm/LARGE-JUMBO-VACUUM-STORAGE-SPACE-SAVING-BAG-BAGS-VAC-BAG-SPACE-SAVER-BAG-/130926965594?pt=UK_Storage&var=&hash=item1e7bdaf35a


to vacuum bag the part and hopefully hold the CF in position. I don't have a proper vacuum pump or any consumables yet so this is my only other option.This was a shot in the dark as I haven't seen anyone use these before accept a young lad working with prepreg but I decided to give it a try anyway.


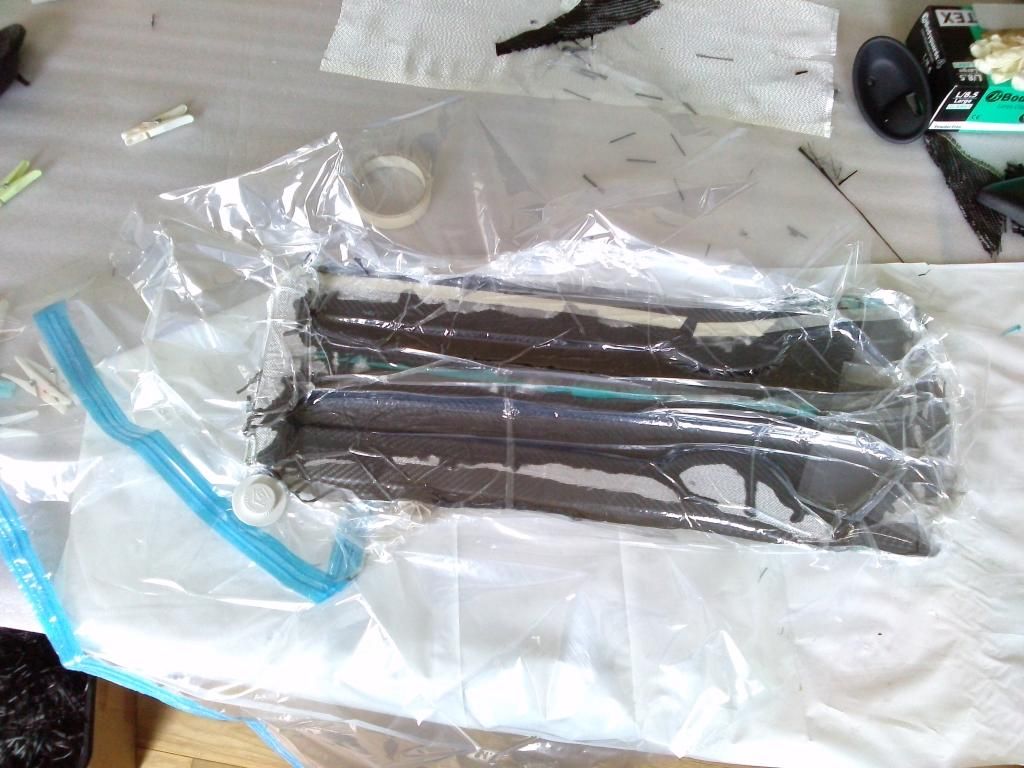
This is it bagged, I used one full layer of 200G 2k twill, some off cuts for a second layer and one layer of roving, next time I will try just one layer of CF with two layers of roving, maybe make the 2nd layer heavier. These parts are purely cosmetic and weight is not an issue.

I tested it withjust the mould and found the bag didn't easily fit into all the corners of the mould so I pinched the bag at the corners with clothes pegs so that there would be excess material and marked its position in the bag so I could easily return it to the correct position when  the CF was laid.

You might notice I had to use a second bag as the first one wouldn't hold the vacuum.Not sure why as it had earlier but I had another one anyway so it wasn't a problem.

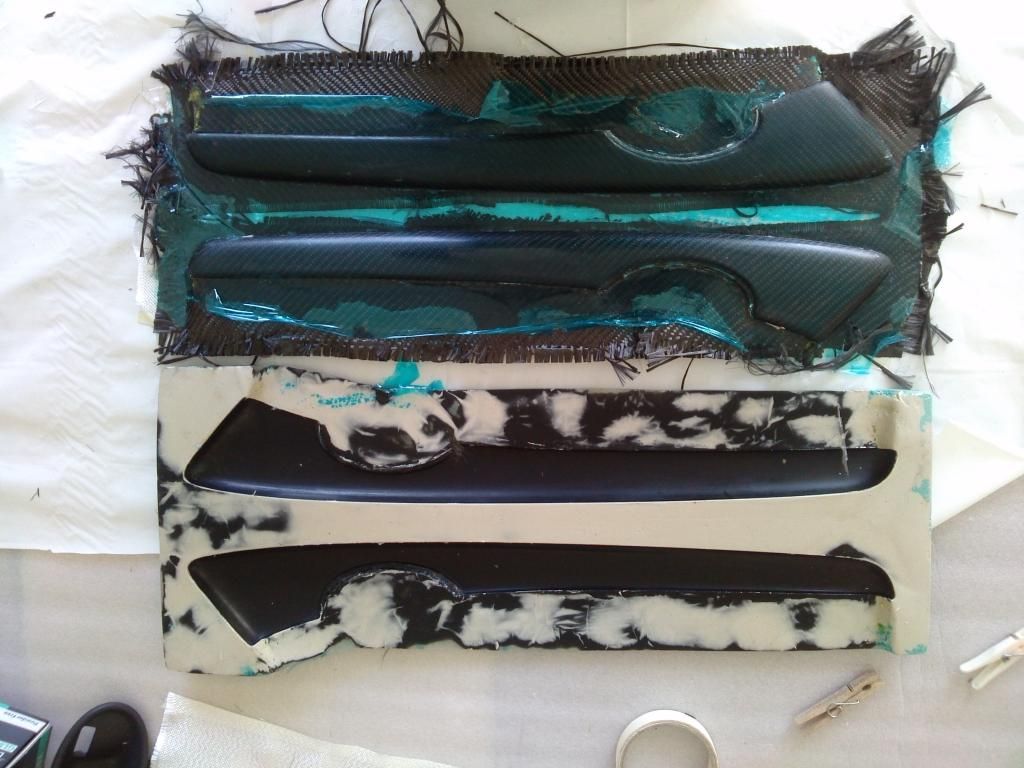
When de-moulding I was surprised how easy it was to get the bag off the part, it didn't  really stick to the resin at all and the second bag did a very good job of holding the vacuum overnight.

The purists among you will probably be cringing at the methods I used but this is the result. The part came out cleanly and easily without any damage to what is probably a very dodgy mould.


Roughly trimmed and cleaned up, still need loads of work.


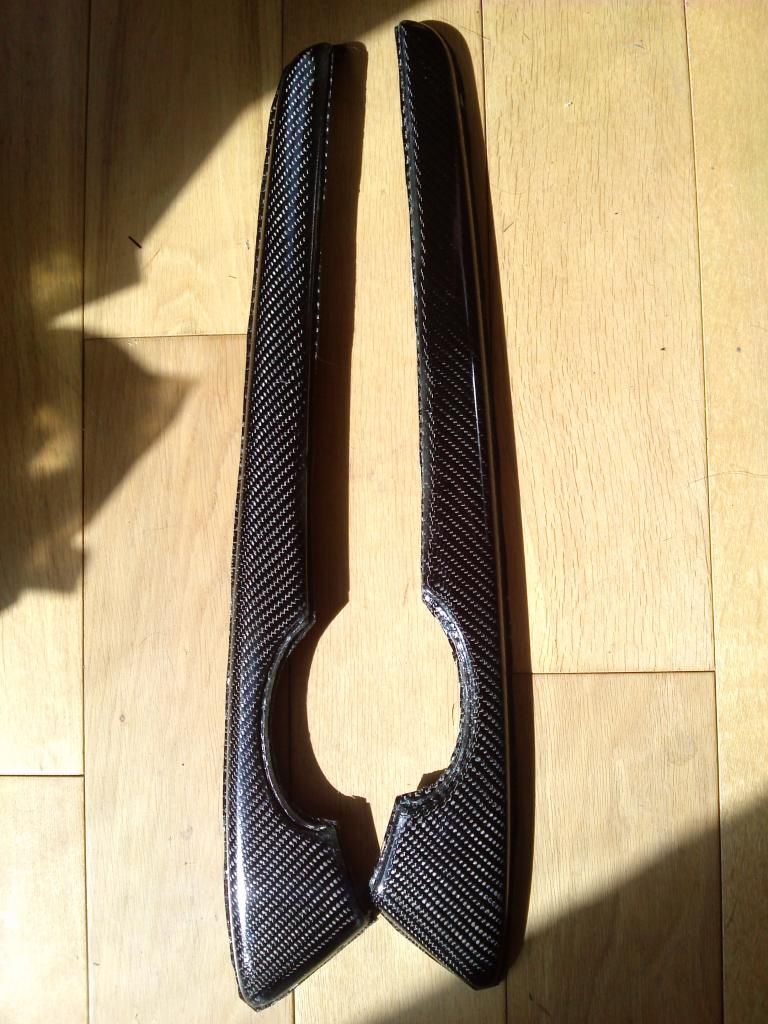
Not perfect as some pin holes and and a couple of holes probably caused by trapped air but these shouldn't be too hard to sort so really pleased and am happy to try using these vacuum bags again.

Anybody else tried them?


Edited 10 Years Ago by Alibro
winty
winty
Supreme Being (75 reputation)Supreme Being (75 reputation)Supreme Being (75 reputation)Supreme Being (75 reputation)Supreme Being (75 reputation)Supreme Being (75 reputation)Supreme Being (75 reputation)Supreme Being (75 reputation)Supreme Being (75 reputation)
Group: Forum Members
Posts: 14, Visits: 592
Interesting idea, would like to see some more results using them bags. 
As for not putting mw in your gel coat. Just wipe over it with acetone, never been a problem in my job.
Hanaldo
Hanaldo
Supreme Being (14K reputation)Supreme Being (14K reputation)Supreme Being (14K reputation)Supreme Being (14K reputation)Supreme Being (14K reputation)Supreme Being (14K reputation)Supreme Being (14K reputation)Supreme Being (14K reputation)Supreme Being (14K reputation)
Group: Forum Members
Posts: 2.5K, Visits: 28K
I used to use those bags when I first started, just skinning things. They work well for just cheap vacuum. 

No real need for wax in gelcoat either, just cover it with a piece of cling film or similar. All you need to do is prevent it being exposed to air.
Alibro
Alibro
Supreme Being (200 reputation)Supreme Being (200 reputation)Supreme Being (200 reputation)Supreme Being (200 reputation)Supreme Being (200 reputation)Supreme Being (200 reputation)Supreme Being (200 reputation)Supreme Being (200 reputation)Supreme Being (200 reputation)
Group: Forum Members
Posts: 44, Visits: 384
Thanks guys
After a couple of days I covered it with cling film to see if it would make any difference and after another couple of days it wasn't too bad. It still needed some sanding and fettling before I could use it.

I have been asked how come the parts have a shiny finish as the mould is quite matt?
I sprayed the PVA onto the mould and it had a shiny finish. Unfortunately it also had lots of bumps and imperfections which you can't see in the pics, I have since sanded them away.

I'm thinking the pin holes might be due to air bubbles in the resin so will try to make a vacuum pot to degass next time.
Edited 10 Years Ago by Alibro
Hanaldo
Hanaldo
Supreme Being (14K reputation)Supreme Being (14K reputation)Supreme Being (14K reputation)Supreme Being (14K reputation)Supreme Being (14K reputation)Supreme Being (14K reputation)Supreme Being (14K reputation)Supreme Being (14K reputation)Supreme Being (14K reputation)
Group: Forum Members
Posts: 2.5K, Visits: 28K
Yeh PVA is good for that. Creates it's own surface, so the surface of the mould doesn't matter too much.

The only downside and thing you need to be aware of is when you spray it so thick, you do actually alter the dimensions of your final part. On parts like this it won't matter too much, but if you ever make parts that are dimensionally critical, then PVA might not be the best option. I'm sure you'll have your moulds figured out before you get to that bridge anway :thumbsup:
Matthieu Libeert
Matthieu Libeert
Supreme Being (4.8K reputation)Supreme Being (4.8K reputation)Supreme Being (4.8K reputation)Supreme Being (4.8K reputation)Supreme Being (4.8K reputation)Supreme Being (4.8K reputation)Supreme Being (4.8K reputation)Supreme Being (4.8K reputation)Supreme Being (4.8K reputation)
Group: Forum Members
Posts: 955, Visits: 3.4K
I always use those bags...never had problems with them and always without any leaks

Matthieu Libeert
Founder MAT2 Composites X Sports
website:
www.mat2composites.com


Alibro
Alibro
Supreme Being (200 reputation)Supreme Being (200 reputation)Supreme Being (200 reputation)Supreme Being (200 reputation)Supreme Being (200 reputation)Supreme Being (200 reputation)Supreme Being (200 reputation)Supreme Being (200 reputation)Supreme Being (200 reputation)
Group: Forum Members
Posts: 44, Visits: 384
matthieutje65 (06/07/2014)
I always use those bags...never had problems with them and always without any leaks


Good to know its not just me then. Smile
Hanaldo
Hanaldo
Supreme Being (14K reputation)Supreme Being (14K reputation)Supreme Being (14K reputation)Supreme Being (14K reputation)Supreme Being (14K reputation)Supreme Being (14K reputation)Supreme Being (14K reputation)Supreme Being (14K reputation)Supreme Being (14K reputation)
Group: Forum Members
Posts: 2.5K, Visits: 28K
Matt is probably the 'young guy working with pre-preg' that you've seen using them Laugh 
Alibro
Alibro
Supreme Being (200 reputation)Supreme Being (200 reputation)Supreme Being (200 reputation)Supreme Being (200 reputation)Supreme Being (200 reputation)Supreme Being (200 reputation)Supreme Being (200 reputation)Supreme Being (200 reputation)Supreme Being (200 reputation)
Group: Forum Members
Posts: 44, Visits: 384
LOL, You know your probably right. I bet he doesn't have his wife giving off that he will wreck the cleaner though. Tongue
Matthieu Libeert
Matthieu Libeert
Supreme Being (4.8K reputation)Supreme Being (4.8K reputation)Supreme Being (4.8K reputation)Supreme Being (4.8K reputation)Supreme Being (4.8K reputation)Supreme Being (4.8K reputation)Supreme Being (4.8K reputation)Supreme Being (4.8K reputation)Supreme Being (4.8K reputation)
Group: Forum Members
Posts: 955, Visits: 3.4K
Haha, I broke one a few years ago before I had a pump Wink I dont use a vacuum cleaner to vacuum them... I close the bag with a connector on the bag and then pull the vacuum with a vacuumpump

Matthieu Libeert
Founder MAT2 Composites X Sports
website:
www.mat2composites.com


GO

Merge Selected

Merge into selected topic...


Merge into merge target...


Merge into a specific topic ID...


Similar Topics

Reading This Topic

Explore
Messages
Mentions
Search